Host Gimkit: Easy Steps to Launch Your First Game in 2026
Getting a classroom of students excited about a review session is not easy. Gimkit solves that problem by turning ordinary quiz questions into a live, money-earning game that students genuinely ask to play again. If you have never sat in the host’s chair before, the whole process can feel a little intimidating — kits, modes, join codes, live leaderboards. It looks like a lot to learn.
It isn’t. Once you understand the handful of screens involved, hosting a Gimkit game takes less time than writing a worksheet. This guide walks you through every step of the process in 2026, from setting up your account to reading the results after your first live match, so you can walk into class fully prepared.
What Is a Gimkit Host?
A Gimkit host is simply the person running the live game — almost always a teacher, tutor, or presenter. As the host, you choose the kit (the question set), pick a game mode, set the game options, and control the session from start to finish.
Hosting is different from just “playing” Gimkit. The host has a separate screen with controls the students never see: a live leaderboard, the ability to pause or end the game, and post-game reports that break down exactly how each student performed. Think of yourself less like a quiz-show contestant and more like the producer sitting behind the console, running the show while the players compete on their own devices.
Every live Gimkit session needs exactly one host. Everyone else joins as a player using a game code, so the host role carries the responsibility — and the fun — of shaping the entire experience.
How to Create Your Gimkit Account
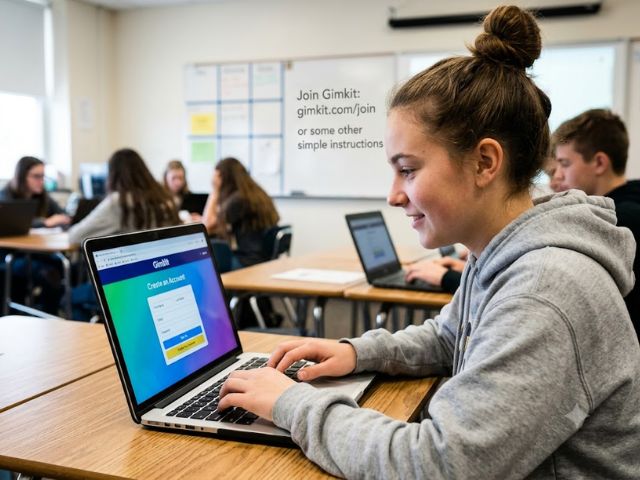
Before you can host anything, you need a Gimkit account. The setup takes less than two minutes.
- Go to gimkit.com and click Sign Up.
- Choose to register with an email address or a Google account (Google sign-in is faster if you already use Google Classroom).
- Select that you’re a teacher, tutor, or educator when prompted.
- Verify your email if asked.
- Land on your dashboard, which is split into three main areas — My Kits, Assignments, and Classes.
New educator accounts also start with a short trial period. Every new Gimkit account automatically includes a 14-day free trial of Gimkit Pro before it reverts to the Basic plan. That gives you two weeks to test premium game modes and features before deciding whether to subscribe.
Once your account is verified, you’re ready to build your first kit or explore the library of ready-made ones.
Read our trending articles to stay updated with the latest online trends and guides — we regularly cover new edtech tools, classroom platforms, and step-by-step tutorials just like this one.
Starting Ahead: Your First Hosting Mission
Before you dive into building a full question set, it helps to understand the four things every host controls in a session:
- The Kit — the actual questions students will answer
- The Mode — the game format and objective
- The Settings — time limits, team structure, power-ups, and pacing
- The Reports — what you review once the game ends
Think of your first hosting session as a short mission with a clear goal: get comfortable with the host screen, not win a “best game ever” award. Pick a short kit (10–15 questions), a simple mode like Classic, and a small group if possible. Save the more advanced modes for once you know your way around the dashboard.
Host Gimkit Easy Steps to Launch Your First Game
Here’s the fastest possible route from a blank dashboard to a live game:
- Log in and open your dashboard.
- Click Create Kit or select an existing one.
- Add your questions and answer choices.
- Click Play Live (or Host) next to the kit.
- Choose a game mode from the Mode Picker.
- Adjust the game settings.
- Share the join code or link with your players.
- Click Start Game.
That’s the entire loop. Everything else in this guide simply expands on each of these steps.
Gimkit Host Without Login
Students never need a Gimkit account to join a live game — only the host does. Players simply visit gimkit.com/join, enter the game code, and pick a nickname (or use a class roster name if you’re using Classes). No sign-up, no password, no app download required on the player side. This makes Gimkit especially convenient for BYOD classrooms, guest devices, or one-off tutoring sessions where creating accounts for every participant isn’t practical.
If you’re using Classes with rostered students, the process is even smoother — students who join through Classes can visit gimkit.com/join and enter the game instantly without typing a code manually.
How to Build a Kit (Your Question Set)
A “kit” is Gimkit’s term for a question set — it’s the fuel for every game mode. You have three main ways to build one:
- Type questions manually — write your own multiple-choice or short-answer questions from scratch.
- Import from Quizlet or a spreadsheet — Gimkit lets hosts pull questions directly from an existing Quizlet set or import a spreadsheet instead of typing everything by hand.
- Use the built-in question bank or AI generator — search Gimkit’s public library of pre-made kits, or generate a fresh set automatically by topic and grade level.
Steps to Create a Kit
- From your dashboard, click New Kit (or Create Kit).
- Add a title, subject, and language.
- Add questions one at a time — each needs at least one correct answer and at least one incorrect option.
- Attach images or audio to a question if your plan supports it.
- Click Finish Kit once you’re happy with the set.
A good rule of thumb for your first kit: keep it short. Fifteen to twenty solid questions run smoothly and are far easier to manage than a sprawling 100-question bank on your very first attempt.
How to Host a Live Gimkit Game (Step by Step)

Once your kit is ready, hosting itself follows a fixed sequence.
- Select your kit — click the green Play Live button next to any kit on your dashboard, or open the kit and click Play Live from the side panel.
- Pick a mode — the Mode Picker appears next, letting you browse each available mode and click “Learn More” to read what it involves before selecting it. Gimkit
- Confirm your mode — the mode you choose gets outlined in yellow to confirm your selection.
- Set your game options — adjust time limits, team size, starting money, and power-ups on the options screen.
- Generate your game code — Gimkit automatically creates a unique join code once you continue past the options screen.
- Share the code — display it on a projector, write it on the board, or hover over the code to reveal a scannable QR code.
- Watch the lobby fill up — player names appear on your host screen as students join.
- Click Start Game — this button sits in the lower center of the screen for 2D modes and in the upper right-hand corner for all other modes. Gimkit
- Monitor and manage — use the host control panel throughout the round.
- End the game — either let the timer run out or click the end-game button manually.
Sharing the Game Code
There are multiple ways for players to join once a code is generated:
- Type the code manually at gimkit.com/join
- Scan the QR code that appears when you hover over the game code on your host screen
- Click the game code to copy a direct join link and share it via chat, email, or an LMS post
Choosing the Right Game Mode
This is where Gimkit really separates itself from other quiz platforms. Instead of one repetitive format, it offers a rotating library of game modes, each with a different objective and pace.
Gimkit runs 13 active 2D game modes in 2026, split between nine top-down maps and four side-scrolling platformer modes, in addition to the original Classic tycoon-style format. In every 2D mode, players control a small animated character called a Gim, moving around a map instead of sitting on a static answer screen.
Popular Modes to Know
| Mode | Type | Best For |
| Classic | Tycoon | First-time classes and quick review |
| Team Modes (Classic variants) | Tycoon | Group collaboration and shared strategy |
| Fishtopia | 2D Top-down | Low-stakes, self-paced sessions |
| Snowbrawl | 2D Top-down | Large, high-energy classes |
| Capture the Flag | 2D Top-down | Team competition |
| Trust No One | 2D Top-down | Social deduction, older students |
| Don’t Look Down | 2D Platformer | Fast, skill-based challenges |
| One Way Out | 2D Top-down | Cooperative problem-solving |
Every mode shares the same underlying design: the host picks a kit, students join with a code, and correct answers generate an in-game resource — money, bait, snowballs, or energy — depending on the mode. What changes from mode to mode is simply what students do with that resource once they’ve earned it. Gimkit Info
How to Pick a Mode for Your Class
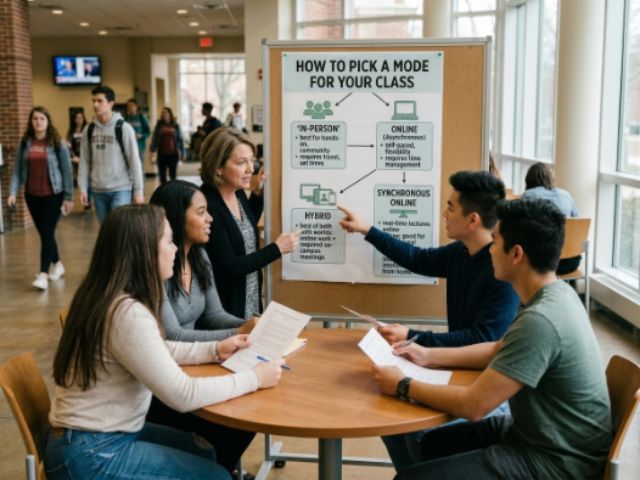
- New to Gimkit? Start with Classic — it’s the simplest to explain and manage.
- Large class, high energy? Try Snowbrawl or Capture the Flag.
- Quiet, self-paced review? Fishtopia works well since there’s no elimination mechanic.
- Want teamwork? Use a team-based Classic variant so students share a pooled bank account.
Some modes are labeled Pro Exclusive and will show a lock icon or player cap for free accounts — more on that in the Free vs. Pro section below.
Read More: SFM Compile: The Ultimate Guide for Beginners (2026)
Kits Gimkit
“Kits” deserve one more mention because they’re the true backbone of every session — the mode is just the wrapper. A well-built kit can be reused across dozens of different modes, which means you don’t need to rebuild your questions every time you want to try something new.
A few practical tips for stronger kits:
- Mix question difficulty so the smart repetition engine has room to resurface weaker areas.
- Keep answer choices short — long text options slow down fast-paced modes.
- Use the public kit library to save time on common topics like vocabulary, math facts, or state capitals.
- Duplicate and edit an existing kit rather than starting from zero when updating a unit.
Managing the Game as a Host
Once the game is live, your host screen becomes mission control. While the session runs, hosts have access to a control panel in the top-right corner of the screen that manages the entire game. From there you can typically: IconEra
- View a real-time leaderboard
- See which questions students are struggling with
- Pause the game to explain a tricky concept
- Remove a player who joined by mistake or used an inappropriate name
- End the game early if needed
How to Remove a Player
If a student joins with the wrong name or someone who shouldn’t be in the game slips in, you can remove them at any point. Before the game starts, hover over the player’s name in the lobby and click it to remove them; once the game is running, use the same control from the in-game player list.
How to End a Game Early
You can end a live game from the host screen at any time — 2D modes show a red End Game button among the game controls, while non-2D modes use a power-button icon in the same corner. This is useful if class time runs short or if you simply want to move on to a debrief.
Helpful Host Features
- Nickname Generator — assigns safe, random names automatically so students can’t type inappropriate usernames.
- QR Code Join — hover over the game code to display a scannable code, ideal for younger students.
- Read to Me — reads each question aloud on the student’s device, useful for younger learners or mixed-ability groups.
Reviewing Results After the Game
The learning doesn’t stop when the timer hits zero. Once a game ends, Gimkit automatically generates a report you can use to guide your next lesson.
- Class-wide accuracy — see which questions the whole class struggled with.
- Individual performance — check exactly how each student answered, question by question.
- Time-on-question data — spot students who may have rushed or gotten stuck.
- Exportable reports — download results for grading or record-keeping (features vary by plan).
Use this data the same week, while it’s still relevant — pull up the two or three toughest questions the next class and revisit them briefly before moving on.
Free Plan vs. Gimkit Pro
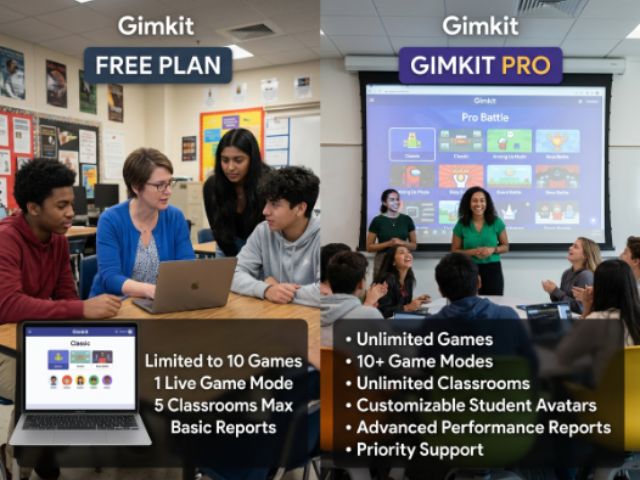
One of the first questions new hosts ask is whether they actually need to pay. Here’s a clear breakdown of what each plan includes.
Is Gimkit Basic Really Free Forever?
Yes. Gimkit Basic has no expiration date and supports unlimited students per session, class rostering, and performance reports. The main trade-off is limited access to the full game mode library.
Is Gimkit Pro Worth It?
If you use Gimkit weekly, Pro is usually worth it — at $4.99 a month on the annual plan, it unlocks the full mode library, assignments, and media uploads for less than the cost of a single streaming subscription. Occasional users may find the free rotation sufficient.
Expand Your Gimkit Hosting Toolkit
Once you’re comfortable with the basics, a few extra tools can level up your sessions:
- Gimkit Classes — roster your students once, then let them join instantly without typing a code every time.
- Gimkit Assignments (Pro) — turn any kit into self-paced homework with due dates and completion tracking.
- AI Question Generator — generate a full set of questions on a topic in seconds when you’re short on prep time.
- Public Kit Library — search thousands of teacher-made kits instead of building from scratch.
- KitCollab — let students contribute questions to a shared kit before you host it live.
Best Tips for Gimkit Hosting
- Preview your kit before class. A quick test run catches typos or broken answer choices before students see them.
- Start with a short session. Ten to fifteen minutes is plenty for a first live game.
- Use a projector for the lobby screen. Seeing names populate live builds anticipation before you even start.
- Match the mode to your class size. Team modes handle large groups better than free-for-all formats where eliminated players sit idle.
- Set a realistic time limit. Long sessions lose momentum — shorter, snappier rounds tend to keep energy high.
- Debrief with the report. Spend two minutes after the game reviewing the toughest question as a class.
Gimkit Join
Joining is intentionally simple, since it’s the one part of the experience non-hosts interact with directly.
- Go to gimkit.com/join.
- Enter the game code shown on the host’s screen (or scan the QR code).
- Type a nickname, or use your roster name if joining through Classes.
- Wait in the lobby until the host starts the game.
- Answer questions as they appear to earn in-game currency or resources.
No account, download, or password is required on the player side — just a device, a browser, and the code.
Tips to Make Your Gimkit Sessions Better
- Rotate modes regularly. Repeating the same format every week reduces the novelty that makes Gimkit exciting.
- Pair Gimkit with a physical whiteboard. Jot down the join code large and clear so no one asks twice.
- Encourage healthy competition, not chaos. Set expectations about device use and volume before starting.
- Use power-ups strategically. In modes with a shop, occasionally pause to explain upgrade strategy to newer players.
- Save your best kits. Duplicate and tweak high-performing kits for future units instead of rebuilding each time.
Final Thoughts
Hosting your first Gimkit game in 2026 really comes down to four simple moves: build or choose a kit, pick a mode, share the code, and hit start. Everything else — reports, assignments, Pro features — is there to refine the experience once you’re comfortable with the basics. Start small, run a short session with a simple mode like Classic, and expand from there once you and your students find your rhythm. Once you’ve hosted a couple of rounds, the whole process becomes second nature, and you’ll likely find yourself reaching for Gimkit more often than a traditional review worksheet.
Leave a Reply